

How To Turn On Camera Settings For Snapchat
If yous've got a new camera for Christmas, chances are you desire to go taking pics with it straight away.
Before yous go rushing off getting all creative with dynamic angles and lighting, at that place are a few steps to follow to make sure your camera's prepare-upwards correctly.
Don't worry though, every bit we're here to help walk you through those basic steps to help you get shooting with your new camera in no time.
ane. Requite your battery a charge
The very offset thing you should exercise is to give your camera's bombardment a full charge.
This volition usually require the battery to be placed within the charger that comes in the box, although some cameras can now be charged through the USB port at their side, with the bombardment within the camera. Bank check your manual to run into how best to practise this.
This process should accept a few hours and in that location should be some indication when it's prepare, such as a blinking light remaining lit or turning off.
Once this is done, either remove the battery from the charger and popular it into your photographic camera or if you're charging the photographic camera through the USB cable with the bombardment within it, simply disconnect this cable.
2. Prepare the fourth dimension and date
Now turn the photographic camera on. Y'all may be prompted to prepare the time and appointment, and then do this now if this is the case.
If you don't see this option, observe it in the menu – it's usually towards the end, and oft in a menu marked with a cog or spanner, or simply titled Settings. Setting this correctly will hateful you can go dorsum to images after on and check exactly when they were captured, so brand certain to practice this!
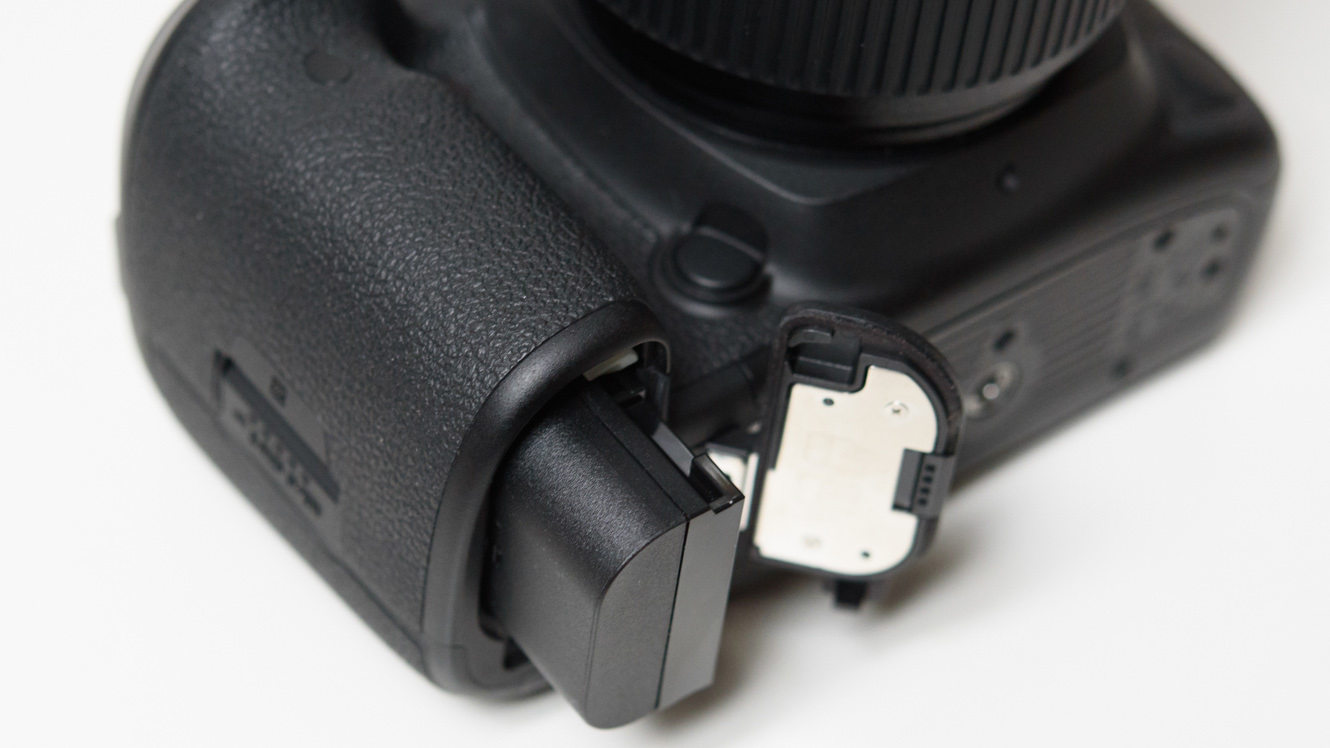
iii. Format retention menu
Now turn the camera off and detect the memory card slot. You lot'll need a memory card to store your images and videos and this will usually be a bill of fare marked SDHC or SDXC.
Insert this into the slot until information technology stays in place, but make certain yous're doing this the right way – if you lot encounter any resistance, take it out and turn it around earlier inserting once more.
Whichever manner circular it fits, it will be with the cutting-cornered side going into the camera first. There may be a label or marking of some kind with small icon to guide you as to the correct method of insertion.
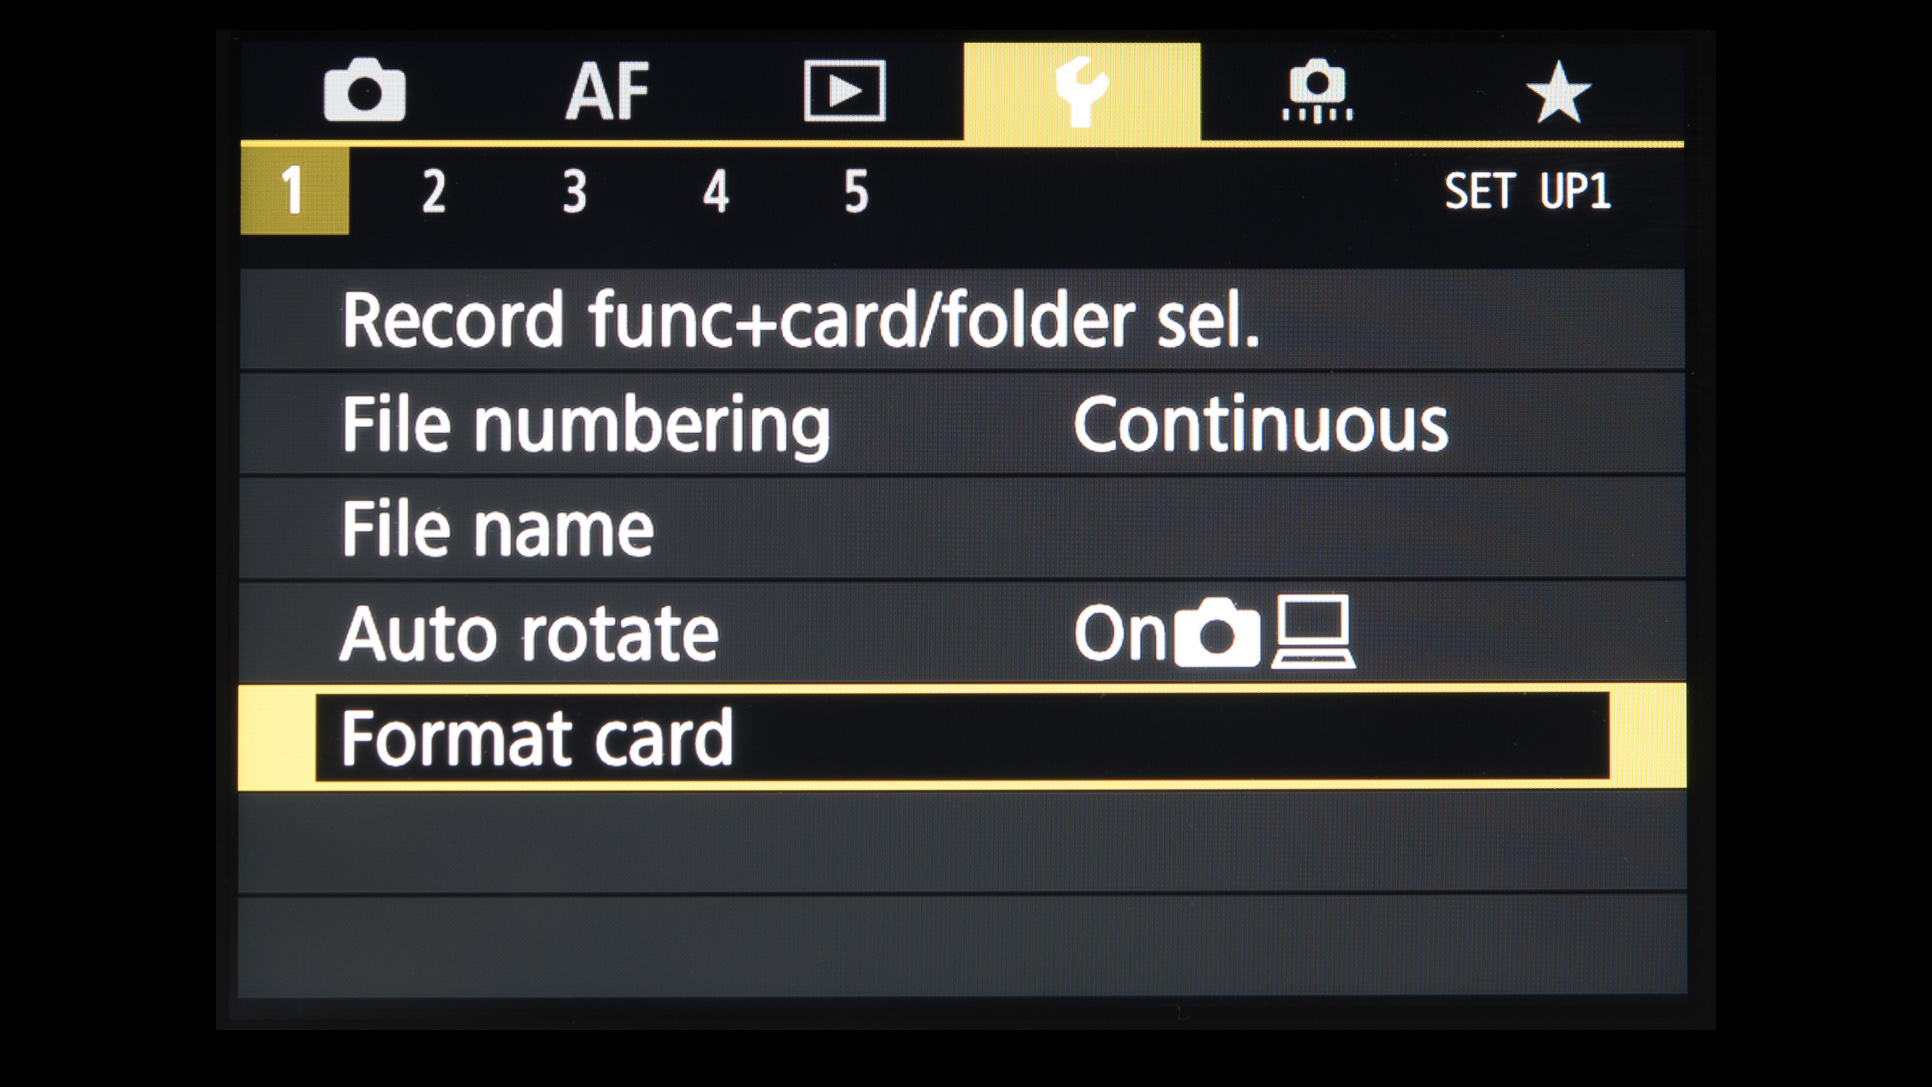
In one case it's in and the door to this compartment is closed turn on your camera. You may now exist prompted to format the retention card. This introduces the card to the camera so that the necessary folders for storing all your images and videos can be set up.
Press OK and wait a few moments. Once more, if you lot are not prompted to format your card, discover the Format choice in the menu and follow the on-screen instructions.
iv. Become familiar with the style punch
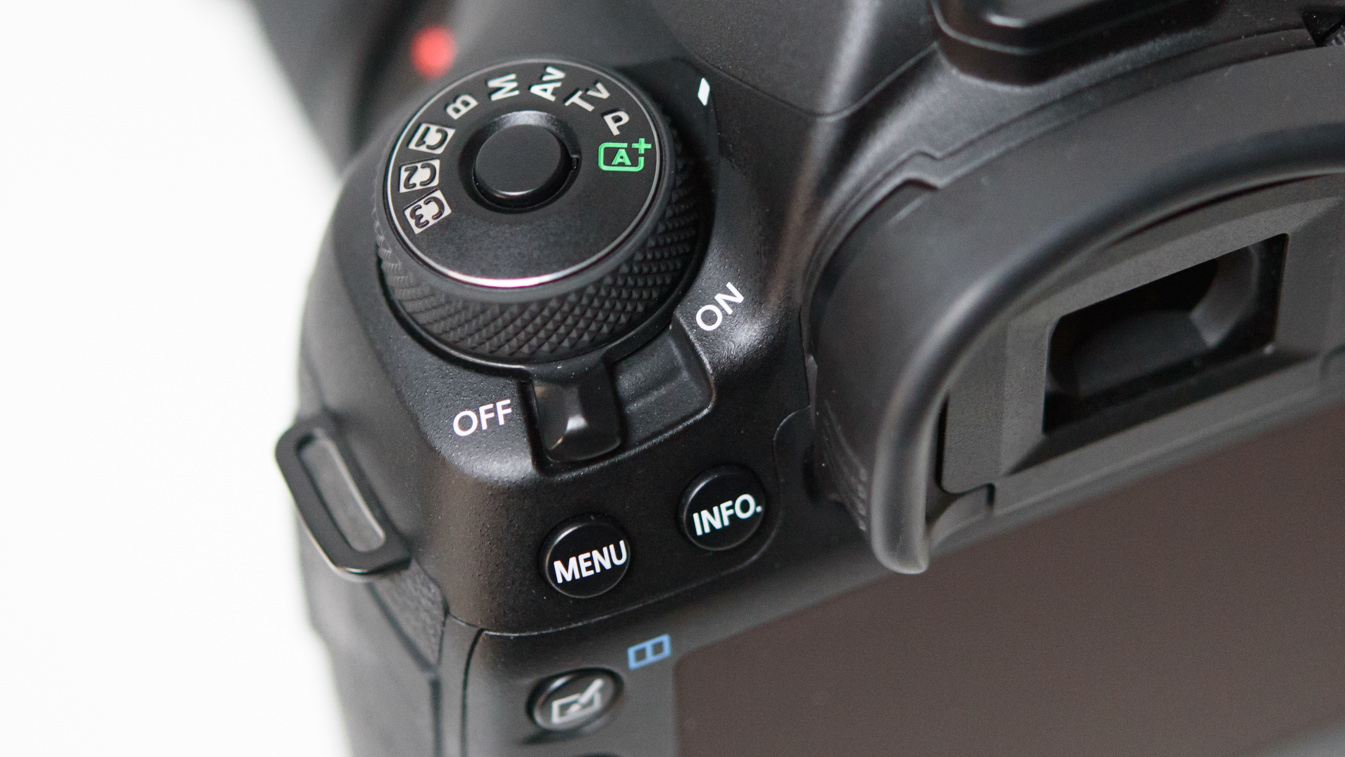
Your camera may have a mode dial that has options such as P, A, South and Thou. There may also exist an Auto mode of some kind. If yous want to leave all the determination making to the camera and simply beginning shooting, you tin set this to Auto and skip the rest of this article.
If, however, you want to have some control, choose the P choice. This volition allow you lot to decide things like when to utilise wink and the ISO setting (more on this later).
The A style, meanwhile, is Aperture Priority and the Southward (sometimes marked Television) mode is Shutter Priority, and these let you to determine the aperture of the lens and the shutter speed respectively. These are great when you desire to take control for creative furnishings, but if you're just getting started the P mode should exist fine.
5. Check your image quality
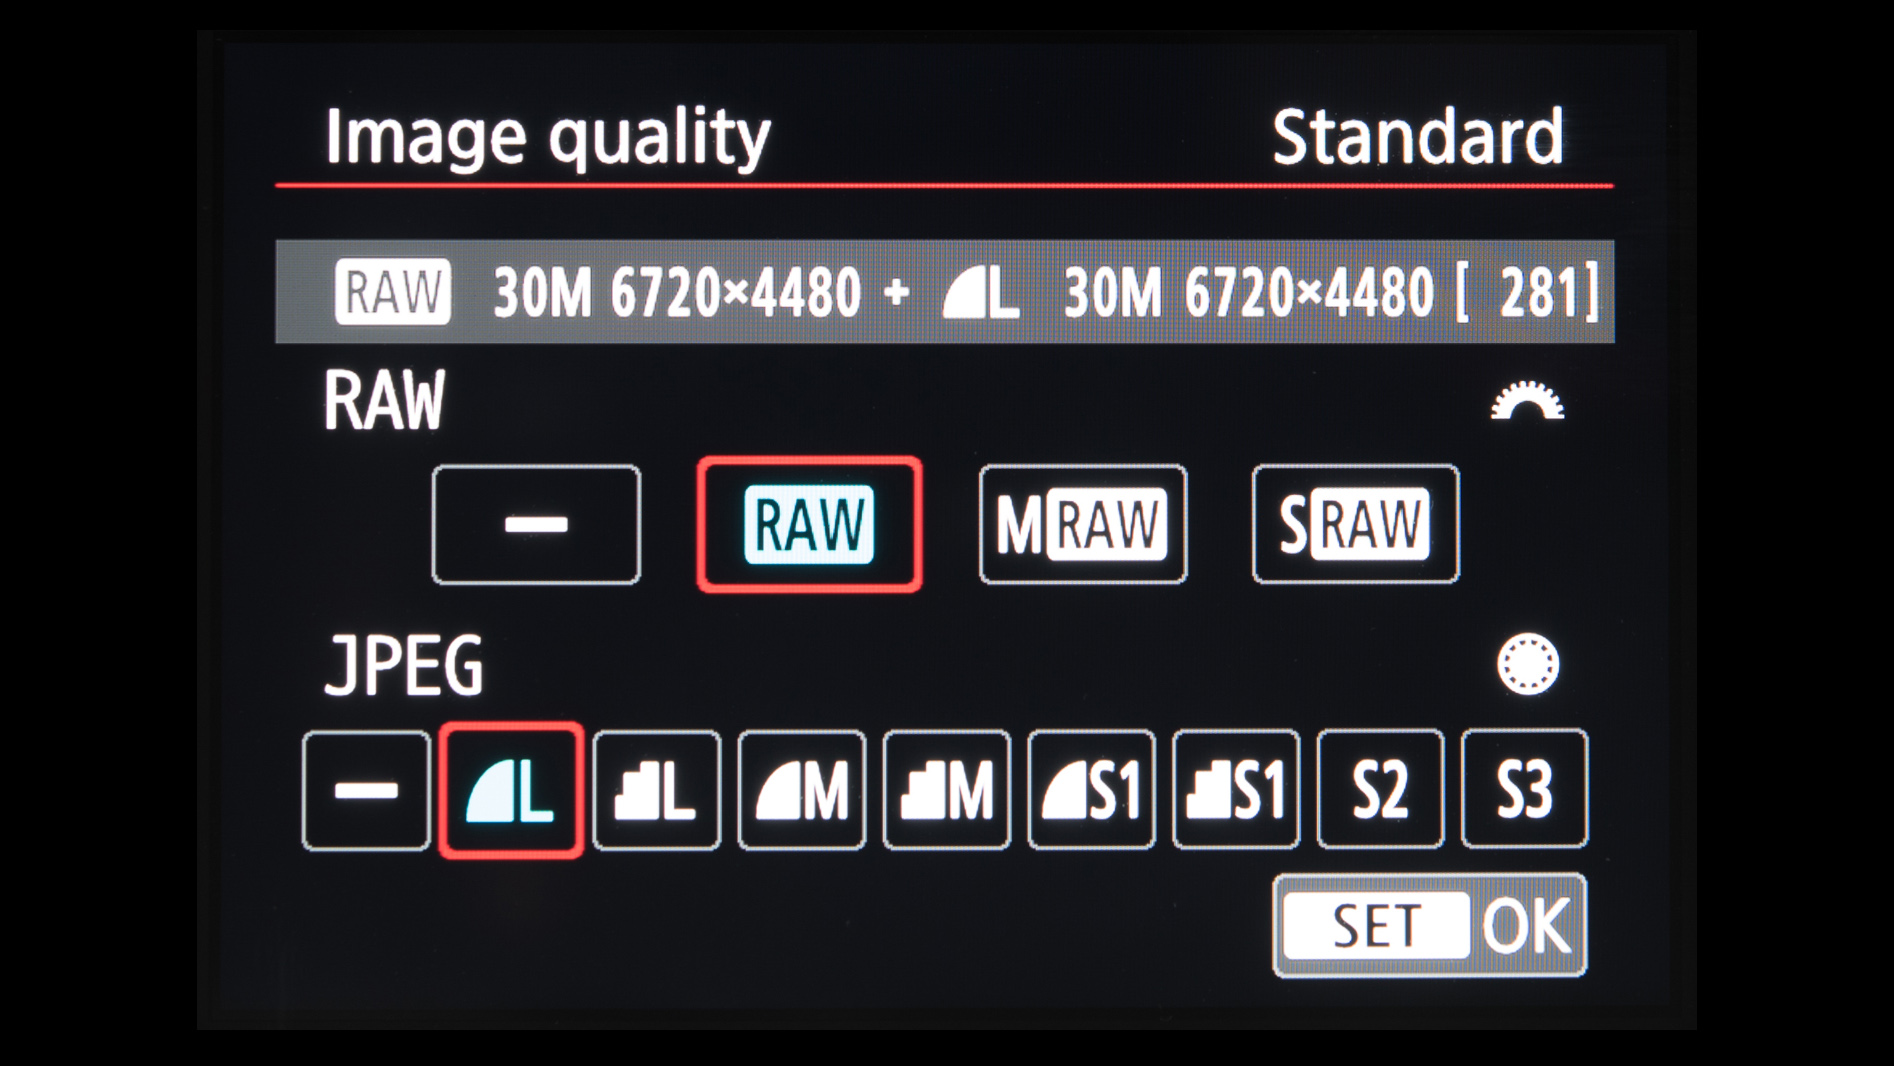
Once this is washed, yous want to make sure your photographic camera is gear up up and so that your images are existence captured in the way you look them to be.
Ane of the first few menu screens should have an Image Quality or File Blazon pick, and it'south hither where you can decide what kinds of files the camera uses to store images. If yous're not sure which to choose, go for the option marked JPEG.
There may exist a few of these options marked JPEG, but yous want to choose the option that has some indication of the best quality. This may exist marked with a number of stars, or exist called Fine instead of Basic, for example. On Canon cameras information technology's the smooth quarter circle icon with the L adjacent to information technology.
Choosing this option will help your images to be as clean and detailed as possible, and free from artefacts that bear upon your image quality.
Should I utilize Raw?
There volition also exist an choice to shoot images in 'Raw' and an selection to employ both Raw and JPEG at the same time. Raw files need to be candy later they take been captured – i.east. with all decisions regarding colour, sharpness and other things selected by the user – and then only select this choice if you imagine you volition learn how to do this at some betoken.
Raw files volition have up more room on your memory bill of fare than just JPEGs and you won't exist able to do much with these files until yous procedure them either. Nevertheless, it gives y'all a much more flexible file to work with so it's swell when photographing in tricky conditions such as at night or when there is very high contrast.
half-dozen. Check your ISO
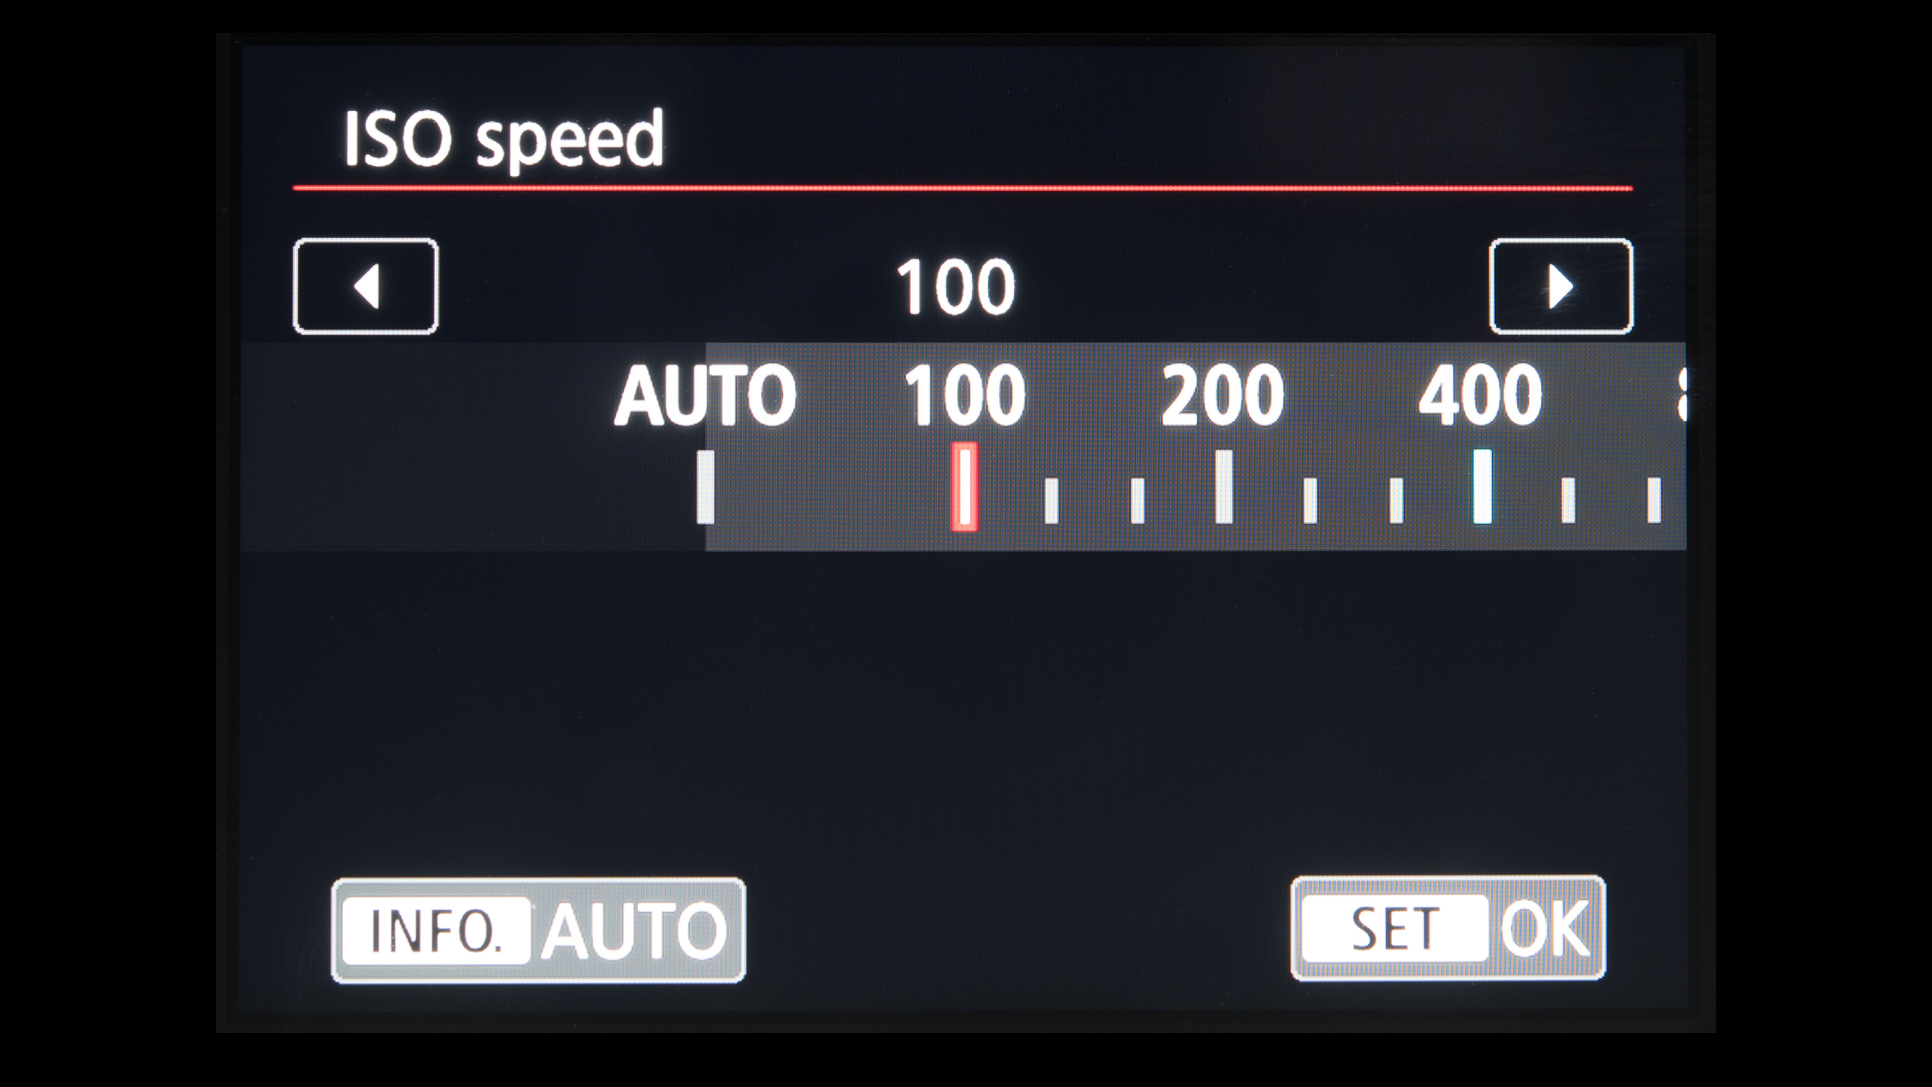
Now check your camera'due south ISO setting. This determines how much light the camera needs to create the image, and as a general dominion y'all want to be using the lowest possible value as this will give you the best quality results. So, ISO100 or ISO200, for example will give yous cleaner results (with less grain) than ISO3200 or ISO6400.
In darker conditions yous may demand to raise this value – otherwise your images might exist blurry. If in any doubt, leave it to the Automobile setting equally this volition permit the camera make these decisions for every shot your take.
seven. Check your White Balance
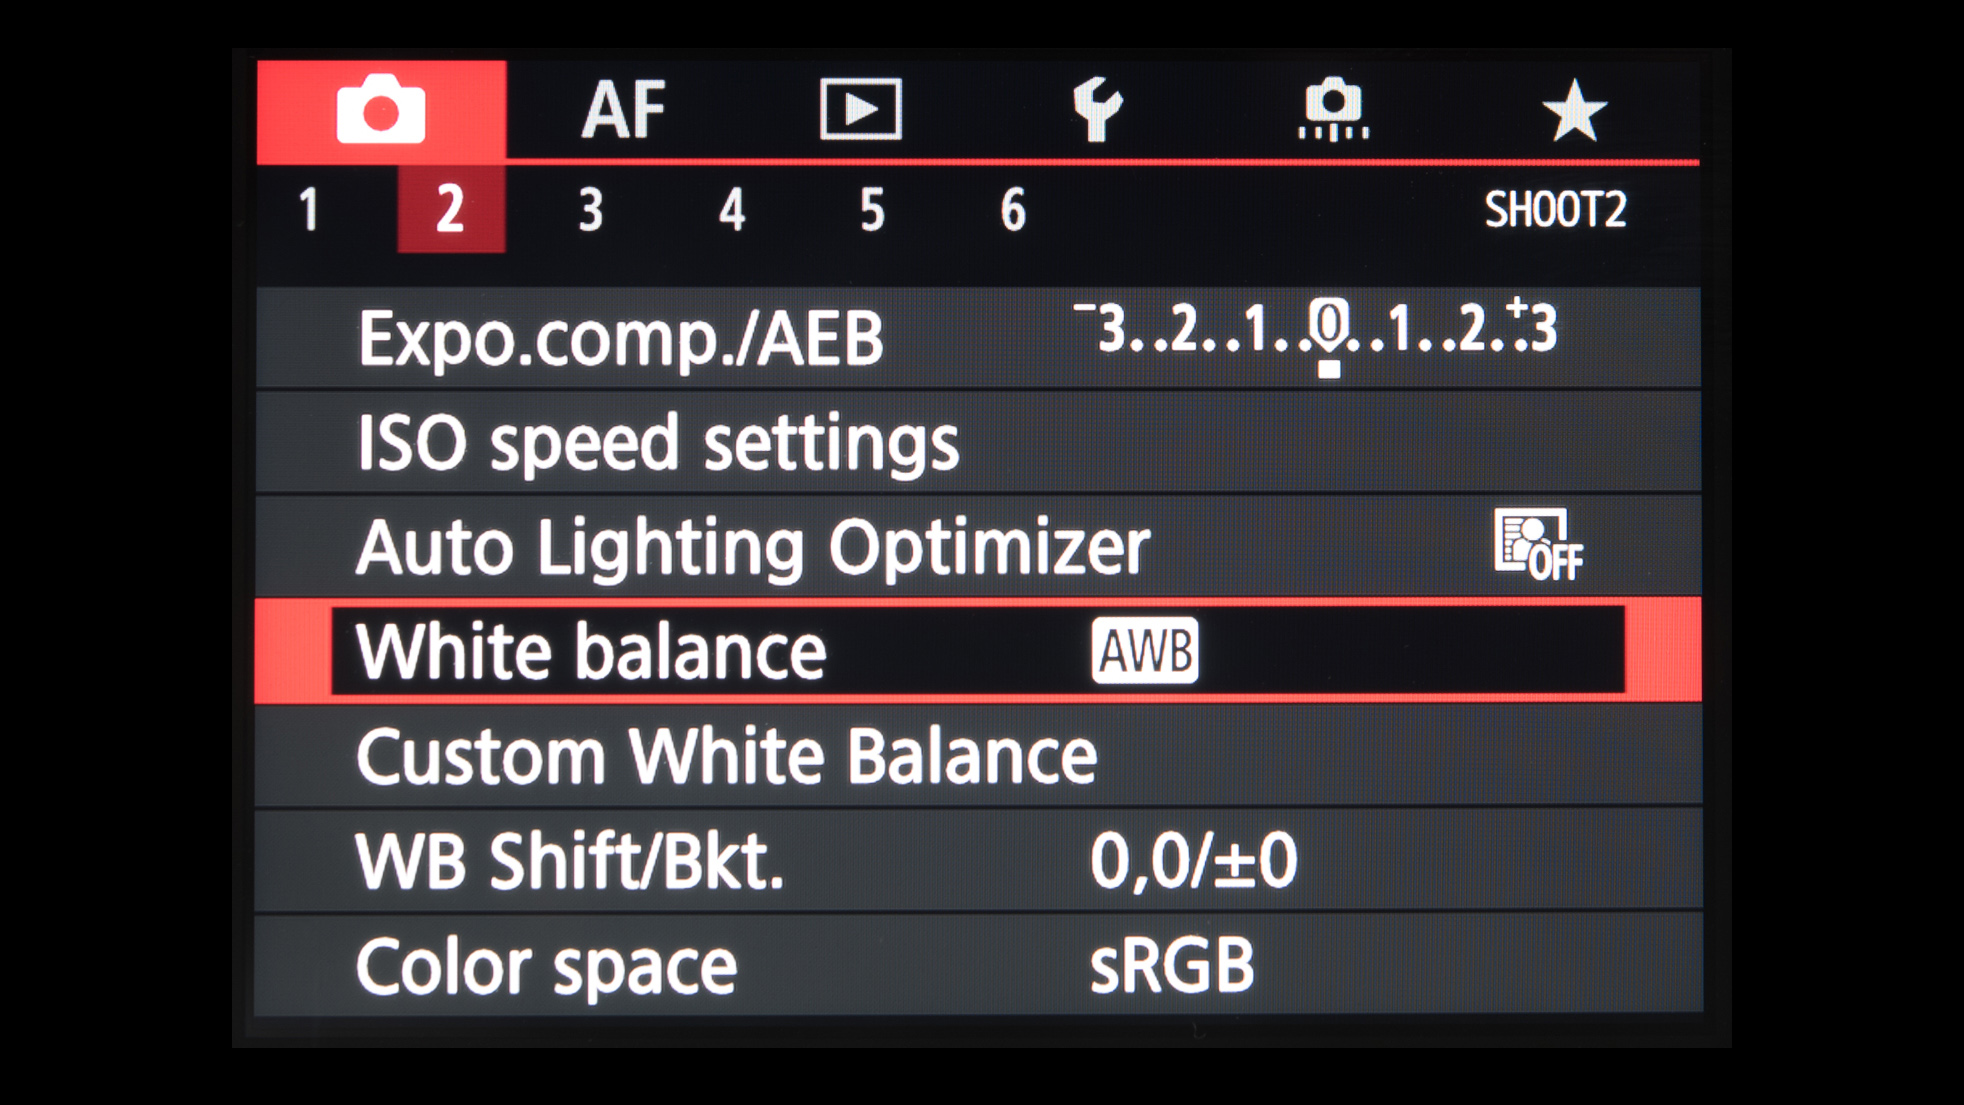
Now, check your photographic camera's White Balance selection is set up to AWB or Auto. This will help you to go accurate colours in your images.
You don't really demand to change this every bit most cameras exercise a pretty expert job hither, although if y'all're shooting nether some kind of artificial lighting (tungsten, fluorescent etc) and you lot discover your images have foreign colour casts, endeavor selecting the option that matches your lighting source to see if this provides you with more than accurate results.
viii. Know your autofocus system
At present, brand sure your autofocus (AF) system is activated. At that place should exist a picayune switch on the side of your lens, or on your camera'due south body, or peradventure even in the camera's menu. This volition help you to go your subjects in focus promptly and accurately.
Now observe the pick to change the focusing area. Your camera may employ an Car area at default, and information technology's fine to stick to this for general day-to-twenty-four hour period shooting.
It'due south worth knowing how to change this to a Single indicate mode, however, and as well how to motility this focus point around so you tin have images with your called subjects off center for more than pleasing compositions.
9. Final steps
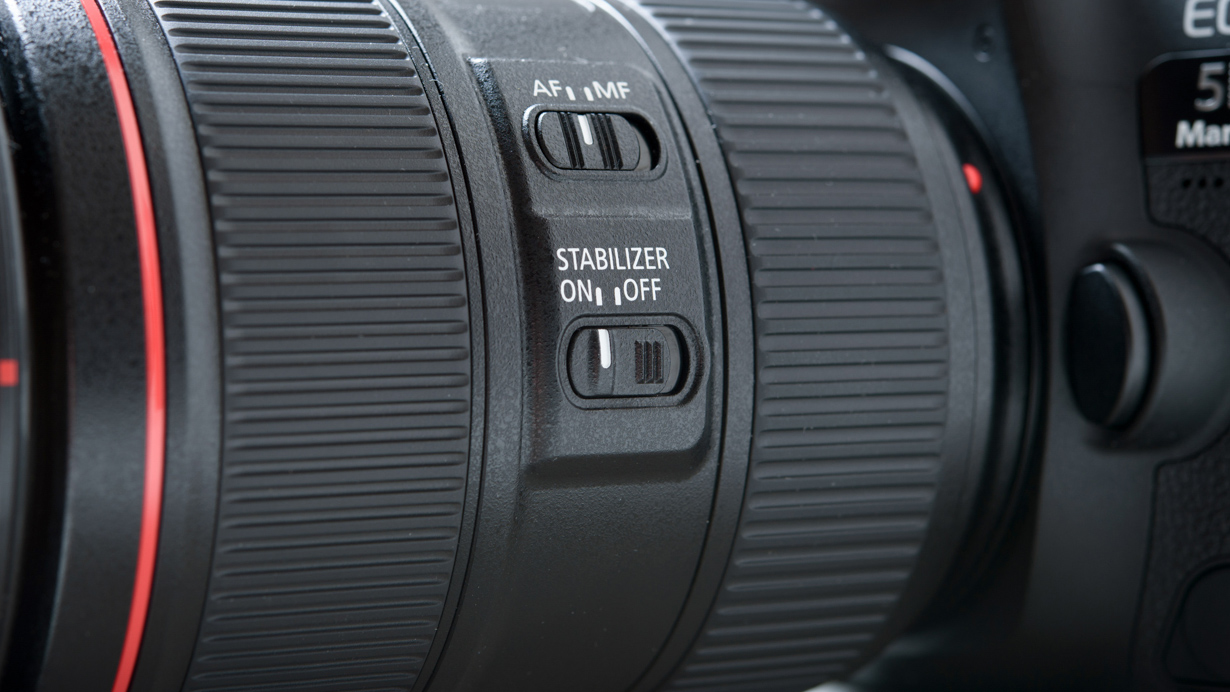
Make sure that your camera's image stabilisation or Vibration Reduction system is working. Again, this may be a switch on your lens, or an option selected on the photographic camera, and this will assist you to get sharper images.
Some other matter to investigate is where your camera's picture tape push is. Fifty-fifty if you lot don't imagine that you lot will shoot many videos, you may want to call upon this for special occasions then it's worth familiarising yourself with this control now.
- The exposure triangle explained
- The ten best camera focus techniques
Source: https://global.techradar.com/en-ae/how-to/how-to-set-up-your-camera-and-start-shooting
Posted by: parisibehisellin.blogspot.com
0 Response to "How To Turn On Camera Settings For Snapchat"
Post a Comment